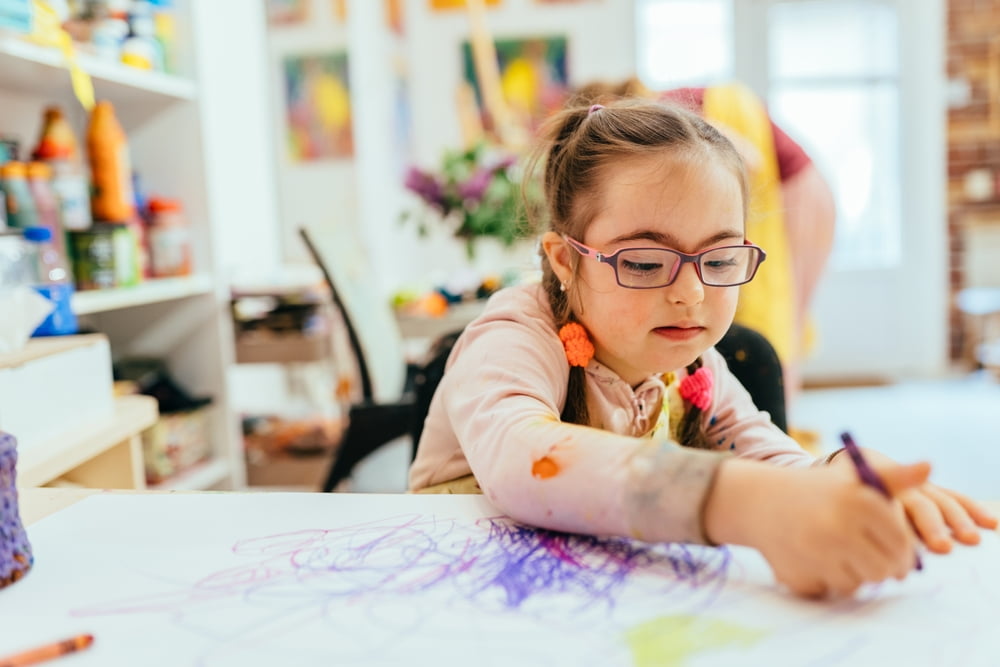
Creating a tunnel book is an engaging art project for the classroom or the home. By combining storytelling with multi-dimensional art, kids learn about depth and perspective while also engaging their creativity. While this type of art became popular in the Victorian era, it’s just as fun and rewarding today.
In this detailed lesson, artist, printmaker and educator, Barbara Mason, demonstrates how to create a simple yet dynamic “3-D” type work that combines individual layers and graphic elements into artwork you can cut out and paste together.
Discover the Techniques for Creating Tunnel Books Video
Join Barbara as she teaches you what a tunnel book is and how to create one of your own. There are two complete demonstrations in this video, with slightly different methods in the final construction.
Making Tunnel Books Lesson Plan
Making Tunnel Books at Home
Use the video transcription below to follow along with Barbara and Artey as they demonstrate how to make tunnel books at home.
Artists along the Golden Road experience the northwest through its art and the artists who live here.
Good morning! This is Barbara Mason at the Golden Road studios. Thanks for joining me today. Today I’m gonna show you how to do another book. I seem to be kind of focused on books lately, and Artey is excited about doing this book. This is called a tunnel book. The way it works is you have images coming forward in five or six different planes, so that it hooks into the side of this fanfold, and each piece of paper goes into the fan across the front. One is in the back, the next one is here, the next one is here. So as you come forward with this, you can have different images doing different things.
I’ve done two of these as a display. But the first thing I want to do is show you how to fold the fan. Folding the fan looked easy, but Artey had a lot of trouble doing it, and he tried again, and again, and again, and he couldn’t get it to work. The very first step is this step right here: we’re going to fold it in half, and then fold it to the middle like that. We’re going to take our paper. Something is on this paper, but I guess that won’t matter. We’re going to take this paper, and we’re going to fold it to the center, and then we’re going to fold it to the center again, just like this, fold both of these ends to the center.
Then, we’re going to turn it over like this, so that our first fold is made there. OK, so we did this. We folded it to the middle, and then the next fold is we’re going to turn it this way, and we’re going to fold this piece right here to the center like this. So, we’re not folding both of these, we were just folding the center one to the center, so when you get done, the fold looks like this.
We folded it to the center, but this piece is still loose. Then we’re going to go on the other side, and do the same thing. We’re going to fold it to the center. And then these pieces that are sticking out, the leftover pieces, we’re going to fold those to the center just like this.
And if you do this right when you get done, you should have a fan. If not, it’s going to be something else. So we want it to look like a fan. We want it to look like this, because this is what’s going to hold our tunnel book.
Tunnel books are very fun to do. You can do any kind of images that you want on them. I’ve made two of them for you. The first one I made with computer paper, and it’s not very, very strong. It’s kind of wobbly because computer paper is wobbly. Right here, I have the drawing I did for it. You could see things kind of overlap each other. It’s based on the Rhyme And Almond Pussy-Cat Went To Sea.
So they’ve got my Alan, my Pussy-Cat, and my boat. The first thing I’m going to do is the very back page. I want to make it a little stronger because it’s not very strong, so I’m just going to glue it. I’m just going to glue it to this heavier piece of paper. The paper just happens to be pink, I don’t think the colors are going to matter. I’m just going to make a big X, and I’m going to hook my paper down. So that it’s glued down pretty good, and I was going to push it down.
You could see I just drew my clouds, my stars, and my moon on here. Now, this is going to go into my very first fold. I’m going to put glue down the inside of this fold, I am going to stick my piece in there, and I’m just going to glue it down. I’m going to do the same thing on the other side. I’m going to put glue down the edge, I am going to stick this in, and glue it down, just like that. So now when I stand this up, you can see that the picture that is the furthest away is glued to the back.
Then I’m going to take the next piece. On the next piece, I think I have my mountains on the next piece. Yes, I do. So the next piece is the mountains. You can see I only get him down so far, because it’s not going to show. I thought, well, I don’t need to color those all the way to the bottom, so I didn’t.
Now I’m going to fold this down, so the next inside fold, I’m going to have my mountains. I’m going to put the glue here just like that, then I’m going to stick my mountain picture in, I am going to make sure I get it lined up at the bottom, so everything is lined up, so it won’t be standing funny.
OK, there we go. I’m going to do the same on this other side. Put the glue in, stick the mountain in, make sure it’s lined up on the bottom. There we go. OK, now, oops, I didn’t get that quite all the way in. Try that again, I want to make sure it’s all the way to the fold. I don’t want it sneaking out. So you can see now what’s happened is the mountains are closer to you than the sky, and so it’s starting to look a little three-dimensional.
Now the next one I have is the picture with the boat. I colored this whole picture because I was worried that some of it might show. So you can see I’ve got my Alan, my Pussy-Cat. Now, if this was heavier paper, I probably wouldn’t have needed to leave this piece across the top. But I was worried that this paper was so thin, so lightweight, that I would need that to kind of hold everything together.
So now I’m going to put lots of glue on the bottom, and just a little here. Get this lined up just perfect, like it before. Now, this is kind of a complicated drawing, and it was kind of hard to cut out. So I have another one that I’m going to show you in a minute, that was a little easier to do. That you might like it better, because what I did was I just drew some things, and then I’m going to cut them out, and stick them on. And I think that might be easier, especially for little kids to do than to draw this whole thing, and cut it out. OK, so there we go, are they all the way to the edge? I think so. OK, so there we have our boat. So now you can see as I stand that up, that my Alan, my Puss-Cat, and my boat are on the sea.
The next image I have is really what the sea looks like underneath. And so you can see that each one is coming forward, it’s getting smaller. A lot of glue down here, and just a little upside. And again, if you use a little heavier paper, this would be easier. I think even construction paper might be stronger than this. This is so lightweight. This is the paper that you have in your computer. So it works, but it’s pretty lightweight. OK, so this is my last. I need a little more glue here. I love these glue sticks, they are so easy to use. Stick this in here, right to the bottom, so we know that it is in the right spot. And right against this fold, so we know it is in the right spot here. There we go. OK, so now, when I stand this up, you can see this book has a story, a really interesting story because it’s the story of Alan, The Pussy-cat who went to sea in the beautiful green boat.
And I think it needs a piece on the front of this to kind of hold it together. And I had originally done this piece here that is another piece of computer paper, but it’s also not very strong. So I think what I’m going to do is, I’m going to take a piece of heavier paper. This is just cardstock. And I’m going to just cut this out around, so that I can have something to hold this down.
And when you’re trying to cut out paper like this, it’s really hard to get your scissors into the middle. So what I did here is I punched a hole with my paper punch. I just went like this, and stuck it in here, and I punched a little hole so now I can get my scissors in underneath.
And I always find that when you’re cutting things like this, if you do it from the back, you have a little more control than if you do it from the front. OK, there we go. We’re not doing anything too fancy here. I am not going to follow the line because I want it to be a little wavy. OK, now, this will be across the top, and I don’t want it to be very big. So I’m going to cut it pretty thin. Now this was what I was really going to use for my other book, so I’ll have to cut another one when we get to that other book, but I’ll do that.
OK, so now we have our front piece, and this is stronger paper, so it’s going to be stronger. We’re just going to glue that on the front. I think what I will do is put the glue on this, make sure I get it in the right place. I want it all the way down that side, and all the way down this side. When you use this glue, you don’t have very long, it stays sticky for about maybe 10 minutes. Maybe not even that long. We want to get it on our book pretty fast, and we want to go right to the edge of our fold like that.
And then on this other side, we want to do the same, go right to the edge of the fold. This is just going to make our book a little bit stronger. So now when we stand it up, that one kind of glued together a little bit there, now when we stand it up, you can see that the whole image of the boat, and the mountains, and the fish. So you’ve got your tunnel. You can see that you can do lots of fun things with this with lots of images.
When I did this, I thought this is pretty hard for kids that are pretty young to do, because it’s a lot of cutting, and it’s a lot of drawing. It’s a lot of coloring. So I thought there’s going to be an easier way to do this for smaller children.
So, what I did was I drew some images which I have here on this piece of paper right here, and I’ve got two cats, and a dog, and owl, and a sun and some trees. And you know, just a few things. So we’re going to put this on the Internet at the end of our video. It’ll be a PDF. Actually, I will do both of these, and you will be able to download this, and if you want to use these images you can.
So what I did, let’s see, I’m just going to set this here.
OK, so now what I did with this one is I wanted to make it easier for kids to do. I have four sections. You see I haven’t glued anything on yet. Four sections like this. So my first section, this is going to be the background. So on this, I’m going to glue the sun.
So one way you can glue, it’s kind of hard to glue without getting glue everywhere. One way that you can glue is you can take a magazine, or a piece of scrap paper, and you can glue on that scratch paper, and then you just throw the paper away. So, if I had a piece of scrap paper which I know I can just use this, I’ll just use the back of this. So this was my scrap from the center of that, so we’ll just use that.
So then one of the things I want to put here is some clouds so I can just glue like this. And I don’t have to be real careful because it’s going to go on the scrap paper, and then I’m going to throw that away. So we’ll put a cloud here, right at the top, I think it would be good to have a cloud at the top. And then we’ll do another cloud right in the middle, this is a little cloud. OK, so there we are, got our little cloud. Of course, you can glue these in any way you want since it’s your artwork.
Then the next page I have, the mountain. All I did was cut the mountains out, and then I cut the snow for the top of the mountain, just a piece of white paper. Oh, did I glue? I guess I glued that on already. Good for me. OK so that’s already glued.
You can see each one of these papers gets a little smaller, so that when you come forward you can see what they’re doing. We’ll put our tree, glue our tree. We want it to stick out a little bit. How about we put it right there? oh, I put glue all over it. I wasn’t so smart, was it? Shouldn’t put glue on the top. So now let’s do the trees, I only want the glue to come partway up, because I’m only going to put the tree, he’s going to stick up a bit. And this one too we don’t want it to come all the way up. So we’ve got our two trees. One’s a little bigger than the other.
Now I’ve got my flower. I think I’ll put the flower, maybe I put the flower over here by, No, I put it over here. OK, so we’re going to glue our flowers. Of course, you can draw your own things. The other thing you could do is if you have catalogs, you know, sometimes you get catalogs in the mail from old places like Land’s End, or what’s the other one? LL bean, places like that will send you catalogs. And the catalogs, they really, really have lots of people in them, and so you could cut out some of those people, and glue them down to your paper just like this.
We’re going to put this guy kind of in the trees because he is an owl. A cat, we will maybe put him a little bit lower because he doesn’t fly. Although cats certainly like to be in trees, maybe they feel safe up in trees is why they like to be in trees. OK so we got our glue on him, and will stick him right here by our tree. OK, so now we have our two layers. And we’ll put our third layer on. Now our very last layer is this pink layer.
To make sure we can see everything pretty well. Oh, pretty well. Wonder we should make that a little shorter, No, I think it’s alright. OK, so now we have to decide where we’re going to put these things.
Our next smallest piece, this pink piece, we’re going to put our flower, I think I’ll put it in the corner. Certainly a good spot for a flower. We will get a little glue on the front of that. And then we have our dog, we are just going to put him in the middle. He’s kind of a happy dog. Probably not a cat chaser. Properly safe. Then our cat; put her on the other side.
You know you can do any kind of animal you want. A lot of times in your coloring books, there will be really good animals, and you can just trace them or actually cut them out of the coloring book to make your tunnel book.
OK, so here’s our, lost my lid, where is my lid? Probably find it here somewhere. OK. Oh, Thanks! A mysterious hand just gave me the lid. You never know who’s going to show up and give you the lid. OK, that was actually the videographer who handed me the lid.
OK, so now I’ve got some white edges for this, and these are not real heavy edges because these are made out of the computer paper. But because these pages are so stiff, I think this computer paper is going to work just fine. So what we’re going to do is we’re going to take our first one that’s folded a little better. We’re going to take our first piece which is the blue piece, and we’re going to glue it down in the back just like we did before. We’re going to put glue all the way down this edge. And then we’re going to slide our sky and Sun in here just like that and glue it down.
We’re gonna do the same thing on the other side. Artey had a lot of fun helping me do this, but he wasn’t too happy when I did kittens, dogs, and owls instead of bears. So maybe the next tunnel book we make will put a bear in it. OK, so now I’m going to put the glue on the mountain because I don’t really want to make sure I get it in the right place. I don’t want to glue things together. So I’m going to put the glue down this edge, and down this edge. Then when I stick it in here, and we want to align up the bottom again. Stick it in here, make sure it’s lined up with the bottom. Get in there, all right, there we go. I am sure it’s lined up at the bottom now. You can see there’s our mountains. Then our next one is our tree and our owl. Again we’re going to just put the glue down the edge of this, and we’re going to line it up with the bottom.
Then our final one is our pink one. We’re going to put the glue in, and again we are going to line up with the bottom. Now the one thing that we don’t have is we don’t have our front piece, and that’s because I used it on that other panel. But I’m going to get another piece of heavy paper. So now when I stand this up, I don’t have the front piece on it, but you can see how you’ve got your things coming forward. And it’s a pretty cool looking book.
What I’m going to do now is I’m going to lay this down and let the glue dry. I’m going to get a piece of that heavy paper here. So I bought this paper at Office Depot or maybe Joann’s. I got 50 sheets of cardstock paper with different colors. You can see it had the green, the pink, the purple, the red and the pink in it. Maybe we use red. We can use red for anything. Maybe I used up all the red. Maybe I’ll go with purple.
OK, So what we want to do here is we want to go around the edge. I don’t want to be smaller than this. so I’m going to just make a little line so I know where the edges are. And then across the top I don’t want it very big across the top. And then across the bottom I don’t want it very big either, because I want to be able to see my animals.
So again, I’m going to take my paper punch, I’m going to punch a hole in it. I’m using my smaller scissors, these are little, tiny scissors, and these scissors work so good for cutting out things that are intricate. And again, if you cut from the back, it’s pretty easy to do this. You can see what you’re doing. You have to get it started first. Once you get going, it’s easier. Wonder if it will be easier if I just cut right across it, because then I wouldn’t have all this stuff I’m fighting here. Paper on the inside will just move a little better. So now I can probably use my big scissors since I’ve got it started. Again, I want to do it from the back, if you do it from the back you can see your line and you’re going to be able to get on your line a lot easier than if you do it from the front.
It’s hard to believe that that would make such a difference, but it really does. OK, so now. Cutting that open like that really helps because it makes the pieces not fight the scissors so much. There’s always little tricks with everything you do that can make it easier. And the longer you make artwork, the more you learn those little tricks. So we can save these scraps. So what I do is I have. I have what I call my box of mini scraps when I do things with colored paper, usually colored paper, but I do sometimes save white paper too if it’s heavy paper.
I just put him in the box and I call it my box of many scraps, and then if I am doing something and I need a little piece of something, I say, oh, let me go to my box of little scraps and see if I have it in there. By doing that I don’t waste so much paper and sometimes when I see a scrap they give me a different idea of something I was going to do. But because I have this scrap that’s maybe not the shape I was even thinking of using. It’ll give me a different idea. Everything gives you ideas.
OK, so now we have a thin piece at the top and a thin piece at the bottom, and I’m going to put my glue on the side of this. The problem with these glue sticks is they tend to dry out. So you want to make sure to keep the lid on them. And it’s no fun to be working with something and opening it up to use it and have it dry as the bone and not working. Looks like I should have made that a little wider because you can see the white. I don’t mind that particularly, but some people might not like to see the white. OK, so now when we stand it up you can see that by having this piece across the bottom and across the top, it just makes everything a little bit stronger, and that’s what we want. We want strong. And if you wanted to, you could take a piece of paper and you could hook it on the back like this, and you could fold it around, so that when you close your book, you’d be able to have the pages overlap, and you’d be able to have a cover on it. But I think it looks pretty good just the way it is. I don’t think it really needs a cover. And there’s our tunnel book.
Thanks for coming to Golden Road Arts. The next time we do a tunnel book, we’re going to listen to Artey, and we’re going to put some bears in it. Maybe we’ll do the teddy bears picnic. If you all know that song about the teddy bears that go out in the woods and have a picnic, it’s a great book and a fun song. So maybe we’ll do that next time. In the meantime, have a good day! Write down your ideas about the virus and quarantine, what you’re doing, how you’re feeling at this really important time. And when you’re older and you go back and read the things you wrote at this time, you’ll be glad that you wrote them down. Thank you very much for visiting with me today and visiting Golden Road Arts and we’ll see you next time.
Artists along the Golden Road draw energy from the organic sensibility and rustic beauty of the Majestic lands we call home. We extend these gifts to schoolchildren through art education, Golden Road Arts celebrating art, empowering artists today and tomorrow.
High-Quality Art Lessons for the Home and Classroom
Golden Road Arts creates fun and educational art tutorials for elementary and middle school kids. Our videos cover a wide variety of subjects that promote art literacy and hands-on techniques. To learn more, watch our free art lessons now. You can also support us by making a donation.