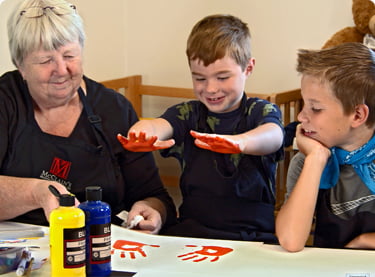
If you are involved in children’s art education, you will certainly understand the benefits of simplicity. Sometimes all it takes for a child to get creative is access to paper, pencils and other simple materials. With that in mind, here is an easy art project for younger children.
In this Golden Road Arts video, artist and printmaker Barbara Mason creates an eye-catching winter pop-up design using paper cutouts. Follow along as Barbara transforms simple paper designs into a cozy 3D winter picture.
Materials Required for Pop-Up Art
The materials required to design 3D pop-up art are paper, scissors, colored pencils (or crayons) and tape or a glue stick.
Learn to Make a Winter Scene Using Paper Pop-Ups Video
Barbara demonstrates how to create a 3D pop-up picture using paper cutouts. Develop hand-eye coordination as you create your own winter scene.
Making Winter Pop-Ups With Barbara Friends Lesson Plan
Making 3D Art Using Pop-Ups
Read the video transcription below as you watch Barbara turn simple drawings into a new creation using the power of pop-up art.
Golden Road Arts is a nonprofit that offers art classes for kids so they can make the most of their own creativity. At Golden Road Arts we believe that children’s access to art is the key to reaching their full potential.
Hi there, this is Barbara Mason. Welcome to Golden Road Arts. We’re going to do some fun projects today. You can see that I have on my mask because I want to be very safe. I don’t want to be sick and I don’t want to make anyone else sick. And you can see that Artey also has on his mask. I’m going to take my mask off while I talk to you so that you can see me a little better, but when I leave this room, I’m going to put my mask back on. That’s very important that we wear masks.
The first things that we’re going to do today is we’re going to make a snowman. This is kind of the time of the year for snowmen, and so I have my snowman that I’ve drawn for you. We’re going to put this snowman on the Internet so you can print it off if you want to. So what we’ve done here is I’ve drawn this nice snowman on kind of a heavy sheet of paper, and we’re just going to color his little holly here. I’m going to make his little holly berries red, and I think I’ll color his nose orange. I mean it is a carrot nose for a snowman. And then I think I’ll make his hat this color. This is sort of a pretty blue. Now, you can make it any color you want, you can even draw your own snowman if you don’t like the one I drew. Certainly fine to do that.
You notice that this snowman doesn’t have any arms, but we’re going to give him some arms here. We have a clever way of making arms. So he needs this neck chief and then he’ll be ready to go. I am going to color his little scarf blue. No one I can see I missed a little bit of his hat here too. Didn’t get the underside. So now our snowman is looking pretty pretty dapper here with this blue hat and his blue scarf. So what we’re going to do is we’re going to make him some arm legs and we’re going to use paper to do that with. So what I have here? You probably seen these before. If you haven’t made these, I’m going to show you how to do it. These are little sprunger things. We’re going to put his mittens and his. Shoes on top of those little Spire things. So the way you do this, you get 2 pieces of paper. They’re about the same size. Two that are the same size, put him like this so they’re at right angles. Remember when we talked about angles, these are right angles, So what we’re going to do is we’re going to glue this with our glue stick. Right angles like this. Now I’m going to take a little piece of tape, because I really want it to stick, I don’t want this to come off when I’m folding it. So first thing I’m going to do is I’m going to fold the bottom one up over the top one like this. And then I’m gonna fold this one over this one like this. Just back and forth all the way up until I’ve run out of paper. So if you do this carefully, it should work pretty well. If you do it crooked. You’re going to have a funny looking arm or, a funny looking leg. But I guess since it’s your artwork, if you wanna have a funny looking arm or, funny looking leg, it’s OK.
So we just folding back and forth. This looks pretty easy, but it’ll be harder than it looks. Now, we’re at the very end. We’re gonna put another little glue here to hold it together so it doesn’t come apart. You can see, I have a little piece here that’s kind of sticking out. I’m gonna just cut that off because I don’t want it to be sticking up. OK, so now I already made the other three of these, So what I’m going to do is I’m going to take my glue stick. And I’m gonna put glue here, I am going to stick one here for his arm. One for his other arm. And I’m gonna do one for each one of his legs. So there we have his legs. But he doesn’t have any hands or any feet yet. So I think what we should do. I cut some hands and some feet, so we’ll see how these look? I think I might make these green. I think he would like green hands. You know, if you had green mittens. So we will just make our mittens green and then we’ll glue it, right here on top of this little arm that sticks out. Will make our other mitten the same color. Glue it on the other side. You can color these any way you want. You can color your snowman any color you want, although snowmen are mostly usually white because after all, it is snow. So there’s his hands. Now we got his feet. I think probably his feet are going to be brown. We just kind of color these shoes brown and I just cut these out. You can make him any way you want, any shape you want and you can color him any way you want. That’s a nice thing about art. You know, you can make it the way you wanted because it is your work. So we have his feet, I think I will put the glue right on here. So we have his left foot, and his right foot. And there we have our snowman with his with his little sprunger legs, and mittens and his feet, and he looks pretty darn cute.
So the next thing we’re going to do is kind of a diorama. We have some coloring pages, so this one we are going to put on the internet. I’m not going to cut this out, but we could cut this out. I have another page here that’s also going to be on the Internet that you can just print off and color if you want. Or you can make your own images you don’t have to use the ones I made, but what I did is I made a little gingerbread house. And so I’m gonna fold this back to help it stand up like this. And then on the bottom I’m going to fold it back. So what I’m going to do is I’m going to tape it because I think maybe tape will work better. We have our piece of paper here that’s like snow and so we’re going to put our gingerbread house in the back, so that it stands up, we will fold these around so that it helps it stand up.
I’ve done all these trees, and so we’re going to fold a little piece of the tree end in the little white piece and we’ll get a piece of tape and will tape it down. And then when we get done, it should look like a forest around our house.
I used heavy paper for this. You could use computer paper, wouldn’t be quite as strong, but I think it would work. This is kind of heavy paper. This is cardstock paper. There is our tree. There is a different kind of a tree here. These trees are called evergreen trees because they are green all winter long, and this is called deciduous tree. It’s a funny word, isn’t it deciduous? Such a big word. What it means is that the leaves fall off in the winter, so these trees are still green. Their leaves haven’t fallen off yet, but pretty soon they will. They turn yellow and red and their leaves will fall off. So there we’ve got those trees, and we got these trees. OK, so now, we have got a couple other little trees here, little green trees, little evergreens. We’re lucky to live where we have a lot of evergreens. They’re so pretty these evergreen trees. You can see what I’m doing here, the bigger trees are in the back, and the smaller trees are in the front. Does that make them look bigger or smaller if they’re closer to you? Things that are far away can look smaller. Things that are close up can look bigger.
OK, so here’s our bushes. A little bush is in the front. So you can color these any color you want. You can make your deciduous trees orange because it’s the time of year when they are orange. Or you can make them green the way I made them green, it doesn’t matter. It’s a good thing about artwork as you can make it any way you want it to be. OK, and you can glue this down instead of using tape. I use tape because it’s faster for me to show you how to do it. Isn’t cool that we have got a gingerbread house, and our trees.
Now I want to show you how to make a gingerbread man. Because I think if we had a gingerbread house, would be kind of fun to have a gingerbread man. So what I’ve done here is I’ve taken a piece of paper, just computer paper, and I folded it in half the long way, this is called a hotdog fold. And it’s called a hot dog fold because it’s kind of long and skinny like a hot dog. Then I fold it in half again, and then in half again. Now, the easiest way to do this is to draw your gingerbread man. If you try to just cut this out, believe me, it’s hard to do. But if you draw your gingerbread man, it’s a lot easier. So gingerbread men usually have a round head. They have arms that stick out like this. And then they have feet that come down like this. So the important thing when you’re making your gingerbread man is that the arms all stick together. See how these arms are stuck together here. If you don’t keep their arms stuck together, then when you cut them out, they won’t be together, they’ll just be all little gingerbread men, but they will not be attached, and it’s a lot more fun to have them attached to each other.
OK, I’m cutting him out. Be close to my lines. It doesn’t have to be exactly on the lines. OK, there we go. Now I make sure that I keep the arms attached. I’m not cutting across the arm. I want to make sure I keep it attached. Here’s his head. And we can go back and draw on these and put their faces in and I’ll just do one. But you can do as many as you want. We can pick any color we want. Maybe we’ll pick red. So we can do their eyes. Their nose and their big smile. Maybe some buttons down the front. Maybe we’ll do some decorations on their arms. This would be like frosting, isn’t it? If they were really cookies, they’d have frosting. And then you can do this on each one, and then when you open these up, you can see that they’re hooked together.
So they’re gonna stand up and you can fold them anyway you want. You can fold them in or out, and they’re going to be gingerbread men. So we have two sets here. Because this was folded in half. So I guess we could hook him together if we wanted. We could hook him together with a piece of tape, and if you accidentally cut them apart you could tape them together. It would be alright. You can see that if you tape all these together they stand up all by themselves just because of the way they’re folded, and so they would look kind of cute in our diorama as well. We could put gingerbread men in there.
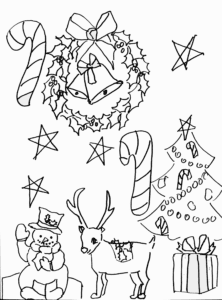
The other thing I want to show you how to do, this is the real simple thing, but you can see on my drawing here, this is just a Christmas drawing or a holiday drawing. It’s got the snowman, a deer, and a package and everything. So we’re going to put this on the Internet. You can download this. You can cut these out. You can color them any way you want.
I want to show you how to make a star because making a star is pretty easy if you know how to do it. It’s just like everything else, there are secret tricks. So the secret trick to making a star is you just make some dots, you just go one, two, three, four, five, five dots like that in a circle, and then you take your crayon and you go to this dot, to this dot, to this dot, to this dot, to this dot, look at that perfect star! and that was pretty easy to do. Wasn’t it? Just connect the dots. So you can make lots of stars this year by connecting the dots. Just remember you need five.
Another kind of a star you can do is if you have three dots like this. You can make a triangle. And then you can make dots here. And you can make a triangle. Now this is a six pointed star, so the six pointed star is made out of two triangles, and the five pointed stars made out of five dots. So I’m sure that you’re going to be able to do that at home. Thank you so much for coming today. Enjoy me and Artey at Golden Road arts, and we hope we’re going to see you again soon with some more fun holiday projects. Since I’m leaving the room, I’m gonna put my mask back on. I want to be safe.
Golden Road Arts is a nonprofit that offers art classes for kids so they can make the most of their own creativity. At Golden Road Arts, we believe that children’s access to art is the key to reaching their full potential. Using simple materials usually found around the house, we explore the basics of the creative process. Together with Barbara, her sidekick, Artey the art bear and other Northwest artists, we invite you to join us on our creative adventure along the Golden Road.
We believe that children’s access to art is the key to reaching their full potential. Using simple materials usually found around the house, we explore the basics of the creative process.
Watch Instructional Art Lessons for the Home and Classroom
Golden Road Arts is Oregon’s leading name for art literacy and instructional lessons for children. We provide tutorials, historical lessons, as well as in-person live events in the Northwest. To get started watch our free art lessons, and consider supporting us with a donation.
Samples


