Part of the fun of creating art at home is turning simple household items into an engaging art project. Kids take a great deal of pleasure from bringing materials to life with a little creativity. And that spirit is at the heart of today’s art lesson.
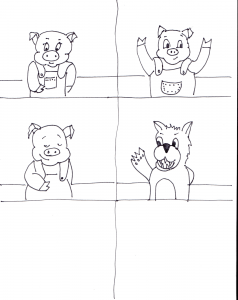
In this comprehensive video, Barbara Mason uses two separate projects to demonstrate the creative potential of regular household items. The first project involves making finger puppets based on “The Three Little Pigs” theme. The second lesson helps students understand the importance of texture in art using a selection of household items
Materials Required for Making Finger Puppets and Learning About Texture
Materials used for this lesson are crayons, markers, tempera paints and a paintbrush or small sponges to apply the paints to the surfaces.
Learning About Texture, Storytelling and Creating Finger Puppets Video
Create your own finger puppets and learn the importance of storytelling in art. Also, engage your sense of touch and sight in a lesson on texture.
Making Finger Puppets and Using Texture in Art
Follow along using the video transcription below as Barbara demonstrates how to make finger puppets in this creative project. The following lesson introduces the concept of texture in art using household objects.
Artists along the Golden Road experience the northwest through its art and the artists who live here.
Welcome back to Golden Road Arts. Today we’re going to do a fun project. This is a great thing for children to do. It is very, very easy. We’re going to make some finger puppets, and what I’ve chosen today is the story of the Three Little Pigs.
So I have my three pigs, my wolf, my straw house, my stick house, and my house that is made out of bricks. Of course everyone knows this story of the Three Little Pigs. If you don’t, you can look it up on the Internet. It’s a pretty simple story.
So anyway, what I did is we have copied these, and they’re going to be with the video on the Internet. You’ll be able to download these drawings if you want to use them. You can have the children color them, and then cut these out. My grandchildren colored these for me. So you can see here is my wolf, and here’s my 3 little pigs. My one grandchild colored one pig bright red, and when we asked him why it was red, he said, well, he was embarrassed, maybe he was embarrassed being part of the story.
But anyway, you can see they are very very cute. We have also the straw house, this is just done with computer paper, so it doesn’t have to be, you know, anything very fancy. There’s the straw house, stick house, and the brick house. You can see that when you get done with this just coloring these, you’re going to have a really fun thing to do. Cutting is a really important thing for children, so the critical thing to do is to not cut off the edges. You know this part. Here is the part that goes around your hand. You can either stand them up like this, or you can put them around your finger. And so you need to be able to put this together with a little piece of tape in the back. So if you cut that off, of course you have to glue it back on.
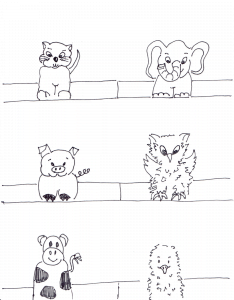
This is a fun story, the Three Little Pigs and everyone knows it, but I think it’s good for children to make up their own stories as well. So I have also done some pages of just some animals, and I’ve got all different kinds of animals here, and I’m going to also put these on the internet so it’ll be really easy for you to download these. The children can color them. and then the other thing you could do that works really well is: if you get catalogs in the mail, or even coloring books that children color in their coloring books, and then you can cut the pieces out, and if they don’t have a strip like this that you could cut on it, you can just cut a little piece of paper, and glue it on the back or tape it on the back, so that you have a way to stand these up or to curl them around your finger.
So the children can make their own stories up, which I always think is a good thing. You can’t have too many good stories. Well, this is a real short video. Very simple project using crayons, markers and some things that you can download from our site on the Internet.
Thank you so much for visiting me today at Golden Road, and I hope that you will come back real soon, and we’ll do another fun art project together.
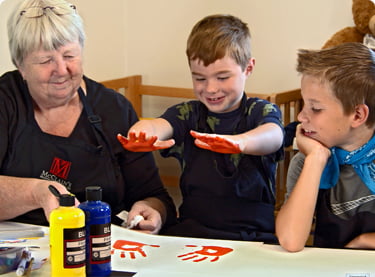
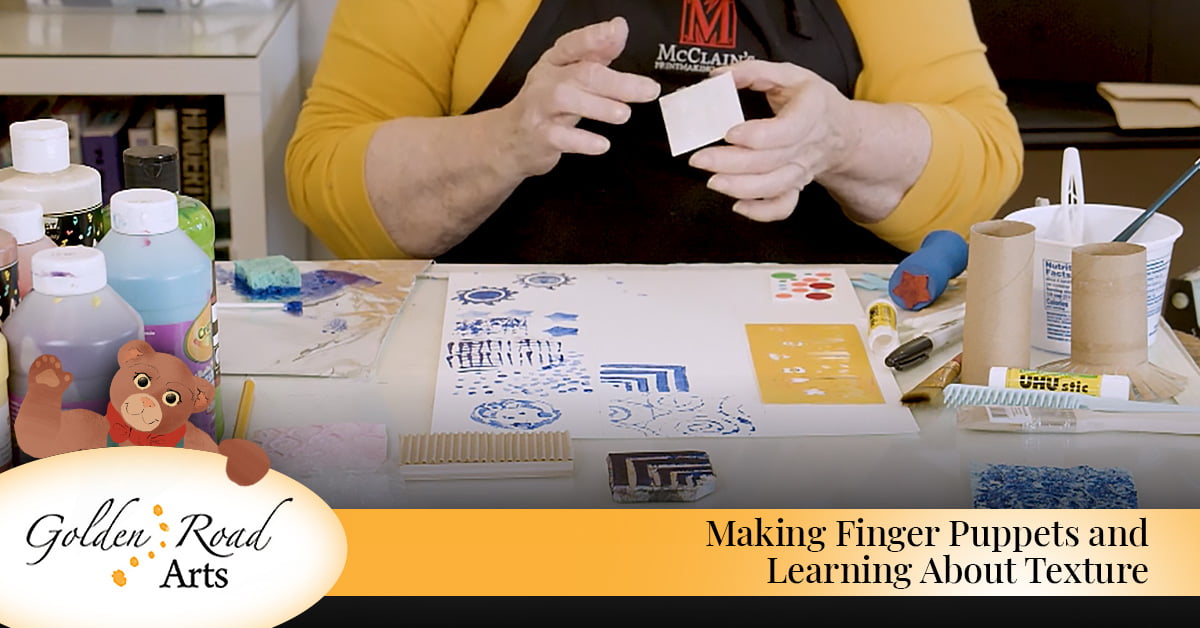
Hi everybody and welcome back to Golden Road studios. Today we’re going to talk about texture. There are a couple of kinds of texture. One texture is a texture that you can feel with your hand. So like if I take this, and it’s rough, and you can see it’s got stuff on it, and I can feel it when I run my hand over at that. It’s got a texture. The other kind of texture is a visual texture. We’re going to talk about the kind of texture that we can make as artists make texture, that is a visual so that your eye tells you that it’s a texture, but really it’s just flat on the surface of your paper that you’re working with. One of the ways we’re going to do this today is we’re going to make some stamps, and we’re going to glue some paper down, both of these things are going to give us a visual texture.
I have some paper here that’s got all kinds of really interesting stuff on it, and I have a little piece of cardboard. What I’m going to do is I’m going to make a stamp out of this piece of paper. I’m going to take some tape here. And I am just going to roll it in a circle, like this. I want to put it on my piece of cardboard, I’m going to take my piece of paper that’s got all this texture in it lay over the top of that, and then we’re going to make a stamp out of this. I’ve got a lot of different things here that we can use for stamps.
I have found that the easiest way to get paint on this is to use a sponge. There’s a lot of different kinds of paint you could use. We’re using tempera paint. This is premium tempera. A lot of companies make this. Dick Blick makes it, Crayola makes it, so there’s a lot of different kinds of tempura. It’s all washable water soluble, you can just clean it up with water. I’ve got some purple out here. What we’re going to do is we’re going to take our sponge, and we’re just going to put of tempera paint on. It doesn’t matter if we don’t get down to the bottom, because really all we’re going to print is the top of this. So now we’re going to take this, and we’re going to lay it face down on our paper like this. We’re just going to push it with our hands. We don’t have to push real hard. Just push with your hands and lift it up. Oh my gosh, look at that, there’s our stamp! You can see now this is a really fun thing.
This is a little panda bear and this came from Panda Express. It was on the takeout container. What I am going to do is I’m just going to paint it, because I don’t see any way that I can hold that and not get tempera paint all over me. I’m just going to paint it with a paintbrush. Still going to get it all over me, alright. Not too bad though. This little panda bear is going to be our stamp. Let’s see how good it stamps. OK, so you can see I’ve just made them all purple here. I’m going to see what happens. Just put it right here. Let’s see him face up for his ears, alright. Push him down. So when I lift this up, if all works well, we should see how panda bear, there he is. Look at that. Isn’t that amazing? That was just a little panda stamp.
Another thing you can do is you can just take a Q-tip. And you can just make dots. And this is going to give you a texture. So this kind of looks like you know how you see bricks, so you see your sidewalk and it looks like this kind of texture. But this is a really easy thing to do and just think if you use lots of different colors, how much fun this would be.
Another thing you could do is you could take a pencil, and you could just use your pencil eraser at the back of your pencil, and you could make this mix. Mix is a little rounder than the Q-tip. It doesn’t look much different from the Q-tip, so we’re making textures.
The other thing you could use is you could just use a fork. This is just a plastic fork. Look at all those repeated lines. Look at that. Look at that texture. That’s pretty cool, doesn’t it? So we could make him go this way, and then we could go the other way with them. Now we’ve got a really interesting texture. And that was just a plastic fork from going out to lunch.
And here’s a piece of cardboard and all it’s got on it are some little stars from the Home Depot, or I mean Home Office store. So we’re just going to put a little bit of paint on those stars. See if we can get those to print. Temper is not sticking real good to this. We will see if it works. So these are all things you should have around your house, it should be pretty easy for you to do this. Let’s see if this one works. How did that work? So we kind of have our stars.
The other thing I have is I have some actual stamps. This is a stamp that I can’t even remember where I got this, but I’ve had this a long time, and it’s got a star on both sides of it. So again, we’re going to use our sponge to put the paint on the star. And then we can just stamp it couple of times till we run out of paint. And then I have one here that looks like a sun, so we’ll stamp it. These are commercial stamps that I bought somewhere. I don’t remember exactly where I bought them. Craftworld or some place like that. Ok, there is our sun and that looked really good. You can see, as I stamped it the second time, it got a little lighter, but it still looks pretty good.
This is a piece of really soft stuff called easy cut, and I actually carved this out with a sharp tool. You could do that if you had access to this stuff. So I’m just going to put my paint on here, and I am going to stamp this. That did a pretty good stamp, didn’t it? I like the way how that one looks.
OK, so now in this thing I just I don’t know if you can see this because of the light. But this is a piece of bubble wrap. I just taped it with my circle of tape on the back of this piece of cardboard. So you can see that bubble wrap how it got lots of circles. That’s really a nice texture. I like that one.
I have some bubble wrap, this is big bubble wrap, so that’s going to look quite a bit different. So we’ll put our paint on. And again, I just taped this with a little circle of tape to the piece of cardboard, mostly just so I wouldn’t have ink all over myself or paint all over myself. OK, so let’s put this in the corner up here. Oh, I like that one. Put it down here too. That came out pretty good.
OK, so now I have here a piece of this is you know, if you take a cardboard box apart, if you take the first layer off the inside of it, it is all corrugated. This is just a piece of the cardboard box that I’ve taped to my little block of wood. I’m running out of the color. We should try a different color since I’m running out of the first color. Maybe we will do a red. That looks better.
OK, so I’m going to get a new piece of foam here. New piece of sponge for the red. I guess it wouldn’t matter if I had my red and purple mixed. So you could use a little sprayer to do this, but I found a sponge works pretty well. Pretty much you don’t get it all over yourself. There, so let’s try that right here. Look at that texture, that’s really good. I like that one that looks really good. Let’s see if we can do it another time before it runs out of paint.
Well, that looks pretty good. OK, so now here I have my piece of cardboard and all I have on this are some stickers from the office supply store, just little dots and we’ll see if that’s going to work. It might work, it might not. They are not very high so it might print, might not print. Let’s see what we get. These are all things that you might have at home, Oh, Yeh, look at that, there’s our little circles. That’s pretty amazing.
Now I have another piece of this fancy paper that’s got circles in it, so that should print pretty well. Put some red on that. Good thing about tempera paint is it washes out, cleans up real easy with water. Cleaning up with water is a good thing. But just because it cleans up with water doesn’t mean it will automatically wash out your cloth, because it does have pigment in it. My advice is to wear old clothes when you do this kind of thing or wearing apron because you don’t want to have it all over your clothes. OK, I’m just pushing with my hands. Very simple. Oh my gosh, look at that, almost like little faces, does it? I’ve got one square left. I think what I’m going to do, because I had a thing here that I got from Home Depot or Lowe’s, I think they use this for some kind of construction adhesive. And so I’m going to just put some ink on it. I am going to try to draw with it. That is interesting, isn’t it? Look at all these different textures we’ve done just with stuff that you could probably find really easily around your house. So all of these things, here’s a comb. I want to get another piece of paper because I have something else I want to show you. This is very fun to do.
There’s one other thing we can do with our tempera paint and our stamping here that’s going to be really fun. This is a piece of an egg carton. So what I have done is I’ve just cut a chunk out. It’s harder to cut an egg carton apart than you would think. So I’m just going to put a little color on here. And then we’re going to stamp it on our paper. So that is very simple and very easy to do and you can see this is just an egg carton.
The other thing that you have around your house that it’s really fun to use as a stamp is a toilet paper roll. So what I did is I just drew a line around here, and then I cut to the edge of the line with my scissors to make this. What I’m going to do is I’m just going to put ink on here, paint actually on here, all around the edge. We did blue and we will use red for the rest of this. A little blue in the red together, how would that be? OK, so now we should be able to push this down, and all of these little edges should print if we did this right. We have to encourage them to print a little better. I am going to lift this off. Look at that! and that was just a toilet paper roll. So see, these are all really fun things you can do with things that are really easily available to you.
This is Barbara Mason from Golden Road Arts. Thanks for joining me today for our lesson on texture. I hope that you will make some textures with things that you have easily available around your house or your art room, and I hope I’ll see you again.
Artists along the Golden Road draw energy from the organic sensibility and rustic beauty of the majestic lands we call home. We extend these gifts to schoolchildren through art education. Golden Road Arts celebrating art, empowering artists today and tomorrow.
Samples
Get Started With Free Art Lessons From Golden Road Arts
At Golden Road Arts, we develop video tutorials demonstrating elements like shapes, colors, textures, lines and form. Our content library covers an array of artistic techniques, genres and styles. Watch our free art lessons here, and please consider making a donation.

