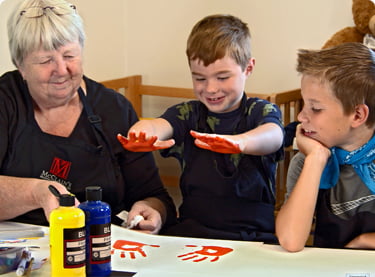
Creating art at home doesn’t need to be complicated. With some simple materials and a creative approach, kids can work on art projects covering many genres. Let’s take a look at some projects using water-based paints as the primary material.
In this Golden Road Arts video, artist, printmaker and educator, Barbara Mason (with a little help from Artey), explains and demonstrates three easy-to-do art projects for children that can be created with materials around the house.
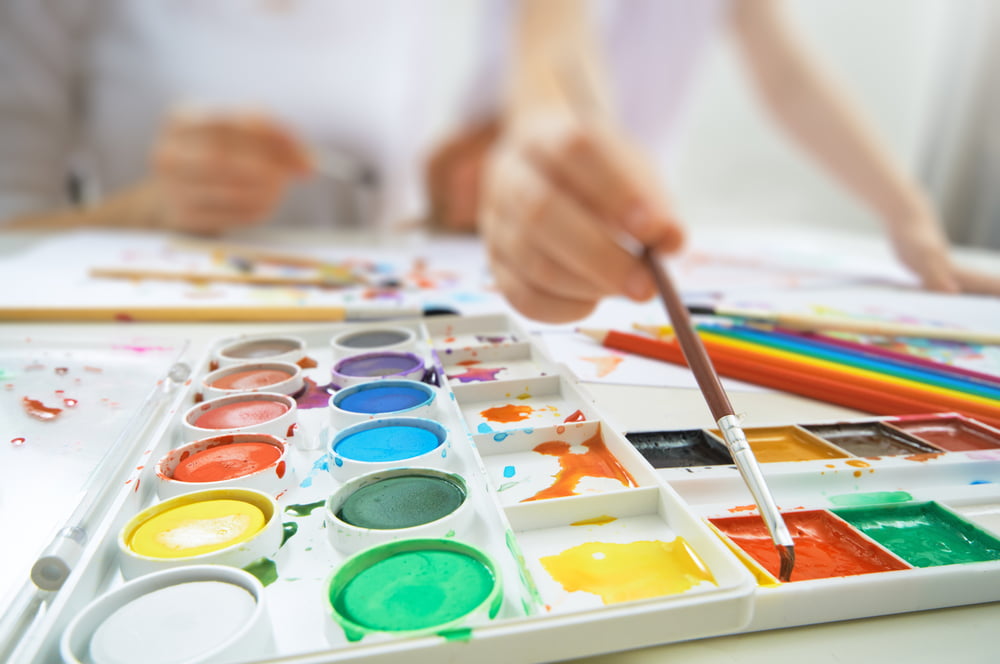
Materials Required for Water-Based Paint Project
The required materials are watercolors, poster paints, white construction paper, scissors and a salad spinner. Additional materials include cottage cheese containers, various-sized combs, a paper cup, coffee filters and water-soluble coloring markers.
Learn to Make Water-Based Paint Creations With Everyday Objects Video
Join Barbara as she demonstrates how to turn items you can find around the house into beautiful pieces of art using water-based paints.
Water-Based Paint Projects Lesson Plan
Making Water-Based Paint Creations
Follow along using the video transcription below as you watch Barbara demonstrate how to create water-based art projects with your children.
Artists along the Golden Road experience the Northwest through its art and the artists who live here. Hi, this is Barbara Mason Golden Road Arts. Welcome to my studio. I’m going to show you some really simple things that you can do. Hopefully with stuff you have around your house. I don’t know how many supplies you have. But this is a new time when we’re all sort of sequestered. And if you have the things that I’m going to show you you’re going to have a lot of fun with your kids.
So one of the first things I’m going to show you is how to do our amazing coffee filters. These coffee filters are colored with washable crayola markers. And how you do this is you just take the filter and I actually did two at a time because when I got it wet, it just went right through one into the other, and it was just amazing. So what we’re going to do is take our crayola markers here. We’re just going to color on it, and it doesn’t really matter how your kids do this. If they’re not great at it, it doesn’t make any difference, because when you get it wet, it all Blends together. I was actually pretty careful when I did the first one thinking oh, you know, how is this going to turn out? But when I did the second one, I was not so careful because it turned out great.
You can see I’m doing pretty broad marks. The samples that I have here that we have some pictures of have a little more intense color on them, and they’re a little more, you know, spend a little more time coloring them. So you can see that I have colored this, and even little kids can do this. It is pretty darn easy to do so. I have two filters here one on top of the other, and what happens is when I get this wet, it’s going to go right through the one filter onto the other. It’s going to bleed out. I was shocked when I did this at how well it bled. So when I just spray it, you can see it’s already starting to bleed. It doesn’t take much. So as I’m spraying the water on it, it’s bleeding, and the more it’s wet the more it bleeds, and the amazing thing is it goes right through to the second coffee filter. Look at that. So it’s also going to have the color on it. What I’m going to do is I’m just going to let this dry and when it’s dry, I’ll peel it off this piece of newspaper. We’ll have our beautiful coffee filter.
And so what you can make with this is you can make these into flowers. I mean, they make great flowers. They’re so beautifully colored. So you just do this and a piece of tape and you’re ready to go, or you could make it into a really pretty butterfly. There’s just an unlimited amount of things you can do with these. You won’t have a problem thinking of things that you can do with them once you have them colored.
So one of the things that I want to talk about today is color separation. You know children don’t really understand that two colors make a third color. And so I’m going to do a real simple process that will demonstrate that. If there’s one thing kids like to do, it’s squirt paint. I have a salad spinner right here. And on the bottom of the salad spinner. I have a piece of paper. This is kind of heavy paper cardstock. And so what I’m going to do is I’m going to take yellow. This is just a poster paint by Crayola, and almost everybody carries this paint. I’m going to put just a little bit of yellow in here, and then I’m going to put a little bit of red. If you’re an adult, you know that if you take yellow and red, and you mix them together, you’re going to get orange. But a child might not know that. After they do this, they’re going to remember it because number one, it’s so much fun, and number two, It was pretty darn easy to do. Once they start doing this I want to just keep doing it. So you’re going to have lots and lots of paper.
Here we go. Okay, so I’m going to start to spin, and that paint is going everywhere. It’s going to be really pretty. Okay, so I’m going to take the top off of this, and we’re going to take our masterpiece out, and you can see that we have our yellow and red, which is really kind of a magenta, and then you can see we’ve got orange which is really really a beautiful color. So I’m going to just put this over here to dry.
And so if we do yellow and blue, we should get green. And the kids are going to love doing this. Mostly they’re going to love making a big mess. I am going to encourage you to mix these together just a little bit, so that I’m sure I get some green. I put a little bit of water in these paints to make them a little thinner. Because I did that, I think they might be just a little different weight. So the yellow just seems to be laying on top of the other color. Let’s see what’s happened if we get some green here. Oh my gosh, we got some green. This is really fun. I’m liking this. So there’s our masterpiece, pretty cool.
So then of course, we have to clean our tub, and the easiest thing to do to clean something like this is just take the whole thing in the sink, and fill it full of water. And you know we will clean it up. The good thing about poster paint is it’s totally water-soluble. So even if it dries, even if it dries in there, I’ll be able to clean it up.
Now. Another thing you can do with the same idea is you can take a piece of heavy cardstock. You can do this on lighter weight paper, but it doesn’t hold up quite as well. We’re going to do a similar thing. We’re going to take our ink. We are going to do a little yellow, a little more yellow on this side. Do our red. Then we’re going to do our blue. So in theory we should get all the colors with these three colors. Come on blue. There we go. And now what do you do to make this work? You just take a comb, and I just happen to have this really big comb. So you can really see it with this big comb how it’s going to mix together. And then if you get a smaller comb, and I’m just going to throw my comb in a tub of water, not gonna spend any time trying to clean it up. Well, look at that. And of course, when you go back, you’ve got stuff on there from where you did it before. Depending on how many times you do it, and which type of comb you use, you could do some that are like this. You could do stuff that was just plain. I like the wiggly better. And of course the kids want to do just what I do. They want to just keep doing it until they have mud, but when you start out with pretty colors, even when it gets muddy looks pretty good. And then of course you have to let this dry but the children will love doing this kind of work. It is very simple to do.
The other thing that we’re going to do is I have a piece of paper. This is watercolor paper. You could use the cardstock, but watercolor paper will, of course, accept the water easier. What I’m going to do on this watercolor paper is I’m going to make these little circles. What I did is I took a paper cup, and I cut off a cottage cheese cart so it wasn’t so high, and I just have some ink in here paint, and then I’m going to take this, dip it in that, and then I’m going to start making these circles on here. You can make quite a few circles before you have to go back and get more. What you’re doing with all these circles is you’re making little sections, and then when your sections are dry, you can take watercolors, and you can color each one of these. The paints I have are regular watercolor paints that are dry. They come in a pan like this, each pan is a color on its own. The best way to get these to work is to kind of soften them up to begin by getting a little water in them. If you just start trying to make them work and they don’t work, you kind of have to reconstitute them so that they’re easier to use. We’re just going to put a little water in each one, and then we’re going to take each color, and paint each section a different color.
So what you want to do is probably do all your orange sections at once. You can say, okay well, I want that to be orange, and I want this to be orange. You know, this is really good hand and eye control for kids to learn to use a paintbrush. Paint things where they want it. If you just use the tip of the brush, not only will the brush last longer, but you have a little more control. So you put the point of the brush down, and then you push the rest of the brush down. And then if you’re going to go to a different color, you want to clean your brush off in the water.
I do a lot of stuff in the classroom with children, and one of the things that I do when I’m working in a classroom is I never let the children go to the sink, because if you get 20 kids in the sink at the same time, it’s not fun. Well may be fun for them but not fun for you and not fun for the floor. So what I usually do is I have two buckets, and I have clean water in one bucket, and dirty water in the other bucket, so they take their cottage cheese container or whatever small container you want to use. Cottage cheese containers are pretty good because they’re flat on the bottom. And if you don’t feel them real full, they can hold enough water, and sometimes those little containers that you get for butter would be good too. But I think the cottage cheese is better. And so you just go from one color to the other, and as you go along here you just paint each section a different color. This is pretty easy to do and amazingly fun for the kids. It takes a long time for them to do all the sections.
And you know, if you didn’t want to do this with paint, you could have them just do it with markers or crayons. But the whole idea of painting is going to use a brush, going to get some control. At first it will be all over the place. But the advantage of having these sections is if you mess up, and you get it over the line, this line is pretty thick, and so it doesn’t show if you got the paint in the wrong place. Okay, let’s do the rest with some green. We don’t have green.
So you can see how easy this is, and how pretty it is. Kids love it because they’ve been pretty successful doing this. If they go over a line, and they get two sections the same color, it just doesn’t matter, because it’s your art, and the good thing about your art is it can be any way you want it to be. It doesn’t have to be perfect. It doesn’t have to be in the lines. Well in the lines a little bit maybe, but the whole idea is you’re making your own work, and it can be the way you want it, which is a good thing.
You know, art is a learned thing, and no one was born knowing how to read, and nobody is born knowing how to do art. You have to learn to do it. Painting like this using the brush and painting one color or the other. It’s a great way to learn control, and making art really is about control. I’m going to have red. Let’s get some red in there. So now you’ve watched me paint. I like doing this too. I’m just like one of the kids. I like painting all the things a different color. You know, they have crayon coloring books for adults, and we know why, it’s fun! We all like to do it. Is there any of you out there that are closet crayon people and you have your color book in the closet?
So you can see how pretty this is,and how much the children will like doing it. So when they get done and they read all the colors on here, they have a beautiful piece of artwork with minimal work except for of course the painting. But the good thing is that the skill they are learning with the painting, and handling the brush, and I give them a paper towel right here beside them that they can put block their brush on, so that if their water gets too dirty, they can take their bucket of water and dump it in the dirty water bucket, get some clean water out of the clean water bucket, and come back to their seat. It’s a great thing for a class, simple to do, and a lot of fun! So that’s all we have today for Golden Road Arts. Thank you for being here and I hope this is a great fun project for your children.
Artists along the Golden Road experience the northwest through its art and the artists who live here. Helping us celebrate artistic creativity, and to share what enriches us with our communities. We extend these gifts to schoolchildren through art education. Artists along the Golden Road draw energy from the organic sensibility and rustic beauty of the majestic lands we call home. Golden Road Arts: celebrating art, empowering artists today and tomorrow.
Browse Our Free Art Lessons for the Home and Classroom
Golden Road Arts is an Oregon non-profit creating accessible art lessons for children. Our video tutorials are available for use at home or in the classroom, providing easy access to a high-quality art curriculum. Watch our free art lessons now, and please consider supporting us with a donation.